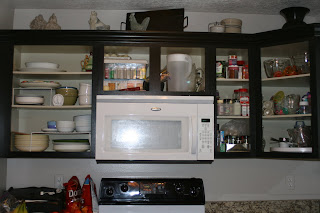
Let's all think back to what it looked like before. Ah, pink formica and super cheap oak circa 1996. . .
And now, drum roll please.
New granite countertops, stainless steal sink and faucet, I'm in love. . .
The cabinets, to put it nicely are kicking my trash. Seriously, I knew it was going to be a project but this was a PROJECT. We;
1. Removed all the old doors.
2. Cleaned, sanded, primed, painted (3 coats) and top coated (another 3 coats) the cabinet bases.
3. Installed crown molding and base molding and bead board (around the island).
4. Had new doors, drawer fronts and drawer boxes comissioned (3 drawers had the front practically ripped off)
5. Sanded, primed, painted (3 coats on the doors that worked the first time and more on the uncooperative ones, and yes, doors can be very uncooperative if they so choose.) I will not to tell you all about the paint sprayer episode, this blog is after all PG rated. Ditched the paint sprayer and did it the old fashioned way, brushes, rollers, and lots of colorful language, tears and Diet Coke.
6. "Distressed" the edges ranomly and lightly
7. Tried to put an antiquing glaze on the distressing for a better look. Totally ruined the distressing and paint job in one gigantic swoop.
8. Went to Sonic for liquid courage.
9. Lightly sanded, repainted, redistressed and backed slowly away from the doors.
10. Clear top coated (3 coats)
11.
12. Hung the doors with my fathers help.
13. Started working on the drawer fronts - repeated steps 5 through 10 except I didn't try the glaze this time but somehow managed to mess up a couple of drawer fronts and had to sand, repaint, redistress and back away.
14.
15. Attached all the drawer pulls to the drawers.
16. Installed new "pully outy thingies" (technical term) to the fake drawers in front of the sink so I can store my scrubbies and things. This alone took over an hour and Mark will never speak of it again. But look how cool it is.
17. Backed away, packed up my supplies and tried not to think too much about the fact that I still had to do the upper cabinets.
Now that I have lived with it, I might just call this an "open design" and call it quits.


Wow!! It looks so great! Remodeling is SOOO much harder than it looks! Great job!!!
ReplyDeleteThat looks wonderful! You should come do my house next...you know...when you finish yours.
ReplyDelete